


Sewing has always been one of my favorite creative outlets, but there’s something extra special about making dolls. It started as a way to create a meaningful gift for my children when their new baby sibling was born, and it has turned into a tradition, a hobby, and even a way of teaching lessons through play. In this post, I’ll share how I discovered a unique vintage pattern, the process of turning it into dolls (and even dinosaurs), the importance of using natural fibers like llama wool, and why handmade gifts like these matter so much in our home.
Finding the Perfect Pattern
When I first decided to make dolls, I was looking for a way to give my children a special gift from their new baby sibling—our tenth baby. I wanted something unique and meaningful, not just another toy. I remembered when I was little, receiving a baby doll when my mom had my younger sister, and how special that felt. That memory sparked the idea: why not make newborn dolls for my children? After some searching, I came across a 1950s pattern that was both quirky and beautiful. At first glance, the pieces looked almost like a giraffe’s head, but once stitched together, the doll took the shape of a delicate newborn. You can find this 1950‘s Alice Brooks baby pattern here.
The Gift of a New Sibling
I loved the symbolism of giving my children their own little “baby” to hold and care for as we welcomed their new sibling. Birthdays are always special in our home, and I wanted the day of the baby’s birth to feel like a celebration for everyone. Dolls seemed like the perfect way to include the children, letting them practice gently holding a wobbly head and nurturing something soft and small. For my girls, I made dolls with dresses, headbands, and booties. For my boys, I wanted something equally special but perhaps less traditional. That’s when inspiration struck: why not adapt the same pattern into a baby dinosaur?

From Dolls to Dinosaurs (and Dragons)
Using the vintage doll pattern as a base, I reimagined it into little dinosaurs. I even embroidered nostrils and playful features to bring them to life. The boys loved them! I gave the dinos booties and diapers, just like the dolls, so they still carried that newborn theme. Next on my list is to try a baby dragon, and who knows what other creatures this pattern might inspire. Sewing has always been fun for me, but transforming a single idea into multiple creative projects that fit my kids’ personalities made it even more rewarding.
Choosing Fabrics and Fibers
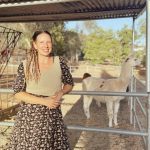
One of my favorite parts of sewing is picking the fabrics. For these dolls and dinos, I used cotton, wool sweaters, and even llama fiber as stuffing. Natural fibers like llama wool have wonderful benefits—it’s lightweight, warm, naturally breathable, and often antibacterial. Using natural materials not only makes the dolls softer and more durable, but it also feels good to know I’m creating something safe and healthy for my children. Cotton gave the dolls structure, while the stretchy wool sweater created a more relaxed, plush feel. Both turned out beautifully in different ways.

The Sewing Process
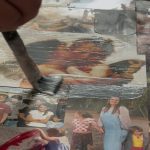
If you’ve ever looked at a vintage sewing pattern, you know they can be both fascinating and intimidating. I start by tracing my patterns onto firmer cardstock or watercolor paper so they don’t shift. I hold them down with smooth beach rocks, then trace with yellow or white dressmaker’s chalk. From there, I sew the darts first, then attach the front of the body to the head, giving that long, odd shape that later turns into the baby. After sewing the head sides and body, I leave a small gap for turning and stuffing. Stuffing with llama fiber or wool fill can be a little tricky, but it’s worth the effort to create a weighted, soft “baby.”

Experimenting with Fabrics
Not every doll comes out the same, and that’s part of the fun. When I used a wool sweater, I experimented with leaving it stretchy instead of felting it first. It made stuffing more challenging, but I liked the unique look and feel. Non-stretch fabrics like cotton are easier to work with if you want more structure, while knits and wools give a cozy, huggable finish. The beauty of handmade dolls is that no two are alike, and you can truly use what you have on hand—scraps, old sweaters, or fabrics with sentimental value
Dressing the Dolls
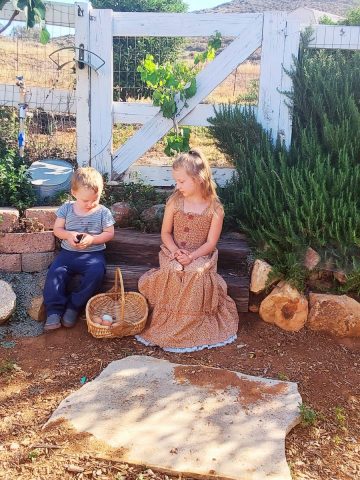
Once the dolls were sewn, the real fun began: dressing them up. I made tiny t-shirts, diapers, headbands, and booties. I leaned into a bohemian style, with oversized bows and mismatched fabrics that gave each doll a unique personality. For presentation, I placed each doll (and dinosaur) in a small basket, which became their “bed.” When the kids opened their gifts, they didn’t just get a doll, they got a whole little world to care for.

Handmade Gifts That Last
What I love most about these dolls is how personal they are. Some of my children tuck them into bed at night, others carry them around, and a few toss them like plush toys. But all of them know that their doll was made just for them. It didn’t cost much money—just time, effort, and creativity. And that’s what makes it so valuable. These are the kinds of gifts that become keepsakes, reminders of special seasons in our family’s life.
Looking Ahead
I plan to keep making these dolls, not only for my children but possibly for others too. They’d make wonderful gifts for newborns, birthdays, or new mamas. With endless options for fabrics, colors, and patterns, each doll can be truly one of a kind. I might even add them to my Etsy shop in the future or my patterns. For now, I’m just grateful for the joy of sewing them, the lessons they teach my children, and the way they connect us to traditions old and new. I am almost done with my dinosaur pattern which I plan to release on my Etsy shop ManifestaFarms soon!

Sewing these dolls and dinosaurs started as a way to celebrate the arrival of our 10th baby, but it’s become much more. It’s a creative outlet, a way to use natural fibers and thoughtful materials, and a tradition that brings joy to my children. Whether I’m sewing a boho-style doll, a quirky dinosaur, or experimenting with fabrics, each project reminds me of the beauty of handmade gifts and the love stitched into every seam.
Recipe

Handmade Newborn Doll (and Dinosaur) Sewing Pattern Tutorial
Yield: 1 Doll or DinosaurTime: 2–3 hours (depending on experience)Skill Level: Intermediate
Materials
- Materials Needed:
- Vintage doll sewing pattern (1950s style works beautifully)
- Cotton fabric, wool sweater, or fabric of choice (non-stretch for structure, stretch for plush feel)
- Llama fiber, wool roving, or polyester fill for stuffing
- Small scraps of fabric for clothing (t-shirt, diaper, headband, booties, etc.)
- Embroidery thread for face details (eyes, nostrils, eyelashes)
- Chalk (yellow or white dressmaker’s chalk works best)
- Cardstock or watercolor paper for stiffening the pattern pieces
- Sewing machine or needle and thread (for hand-sewing)
- Chopstick (for turning the doll right-side out and for stuffing)
- Small basket (optional, for doll’s “bed”)
Tools
Instructions
Step 1: Prepare the Pattern
- Print your pattern and trace onto cardstock or thick watercolor paper.
- Weigh down the pattern with rocks or weights so it stays flat.
- Use chalk to trace the outline onto your fabric.
Step 2: Sew the Head and Body
- Begin by sewing all darts in the head and body pieces.
- Attach the front of the body to the head piece, creating a long central strip.
- Sew the side head pieces to the central head strip.
- Attach the front body to the back body pieces, leaving a small gap for turning.
Step 3: Turn and Stuff
- Carefully turn the doll right-side out using a chopstick.
- Use the chopstick again to stuff llama fiber (or filling of choice) into the arms, legs, head, and body.
- Adjust stuffing as needed for a soft but weighted feel.
Step 4: Embroider the Face
- With embroidery thread, stitch on eyes, eyelashes, and nostrils (for dinosaurs or other animals).
- Keep the features simple and soft for a newborn look.
Step 5: Dress the Doll (Optional but Fun!)
- Sew a simple t-shirt, diaper, and booties.
- Add a headband or bow for a bohemian touch.
- Place the doll in a small basket for presentation—it doubles as their “bed.”
Notes
- Use cotton for structure or a wool sweater for a softer, stretchier doll.
- Llama fiber stuffing gives a natural, antibacterial, breathable fill, while polyester fiberfill works well for an affordable option.
- This same pattern can be adapted into dinosaurs, dragons, or other animals with simple embroidery changes.
- The wobbly head design is intentional—it teaches children to “support the baby’s head” like a real newborn.
Craft Facts
- Cost per Doll: $5–$15 (depending on fabric and stuffing)
- Difficulty: Easy–Moderate (some practice helps with head attachment)
- Durability: High if stitched securely and stuffed well
- Best Age to Gift: 0–10 years (great for newborn gifts, toddler play, or keepsakes)
- Project Time: 2–3 hours for dolls, 3–4 hours if customizing as dinosaurs or dragons
- Keepsake Value: Priceless 💕
Share a Tip